Add your logo and brand your invoices
Pick a theme and colours for your invoices in the Invoice Builder (every plan), and add your logo in Settings → Business (Solo Pro and up).
You can make your invoices and quotes look like yours in two ways: a theme and colours, and your logo. They're set in different places.
Before you start
Themes and colours are on every plan. Your logo on invoices and quotes is on Solo Pro and up. On a lower plan, the Business Logo row shows a lock and an Upgrade plan button instead of the upload.
Invoices on the Free plan also carry a small “Created with JobMistr” mark.
Add your logo
- 1Open Settings from the left sidebar and choose Business.
- 2At the top, under Business Logo, click Upload & Save Logo.
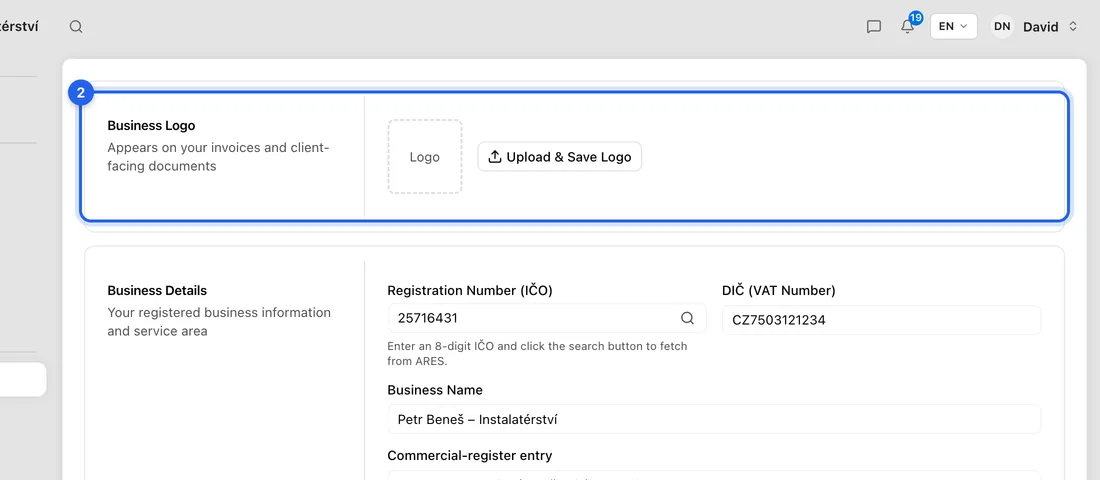
- 3Choose your logo file (JPG, PNG or WebP). A logo with a transparent background looks best.
- 4It saves straight away: you'll see “Uploaded successfully” and the logo appears in the box. To swap it later, click Change & Save Logo.
Choose a theme and colours
- 1Click Invoices in the left sidebar, then Customise layout at the top of the page. (You can also get there from Settings → Invoicing → Open the invoice builder.)
- 2In the Invoice Builder, pick a Theme, e.g. Classic, Minimal or Ocean.
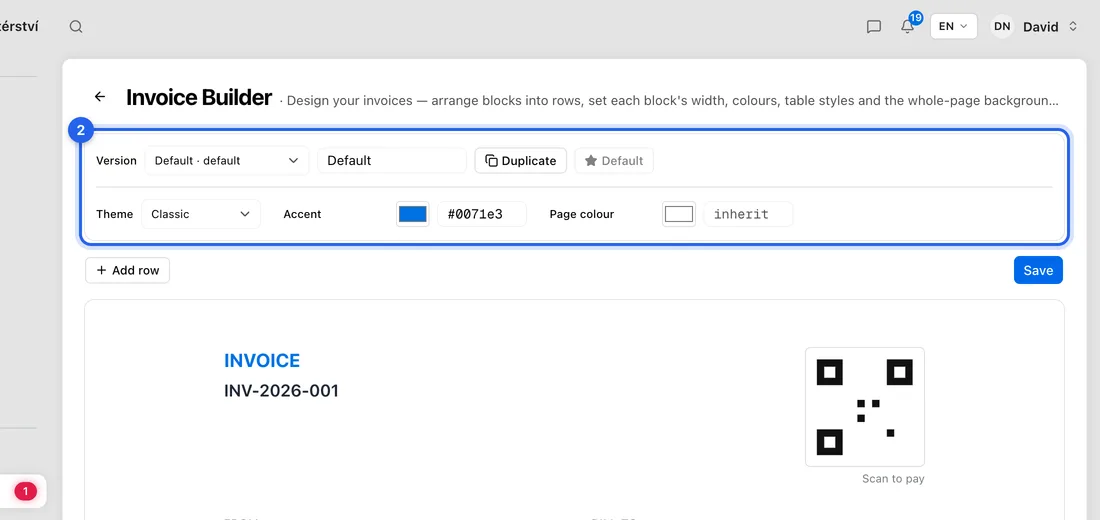
- 3Click Accent to choose your brand colour, and Page colour if you want a tinted page.
- 4Click Save. You'll see “Invoice layouts saved”.
In the same builder you can drag blocks around, change widths and style tables. Quotes have their own builder: click Quotes in the sidebar, then Customise layout.
What happens next
Invoices you create from now on use the new look and your logo. Invoices you've already made keep the look and logo they were created with.
If something doesn't work
Save is greyed out, with “Required blocks removed — add them back to save:”: you removed a block every invoice needs. Add the named blocks back, then save.
“Upload failed”: the file is too big or not an image. Try a smaller JPG or PNG.
Your logo isn't on an invoice: check the invoice was created after you uploaded the logo and while you were on Solo Pro or higher.