Create and send your first invoice
Open Invoices → New Invoice, pick a client, add your lines and click Send Invoice. Your client gets it by email with the PDF attached.
An invoice takes a couple of minutes: choose who it's for, add what you did and what it costs, and send it. The app numbers it, works out the totals and emails it to your client.
Before you start
Do these once, so your first invoice goes out right:
Add a bank account, or the invoice goes out with no way to pay it (see Add your bank details so clients can pay you).
Set your VAT status, so VAT is added only if you're a payer (see Set your VAT status).
Make sure your client has an email address saved. That's where the invoice is sent.
Invoices are on every plan. The Free plan allows 5 invoices a month.
Create the invoice
- 1Click Invoices in the left sidebar, then New Invoice at the top right.
- 2Under Client & Job, click Select a client... and pick your client. Not in the list yet? Click + (Add new client), fill in the client and save. You come back to the invoice with them picked.
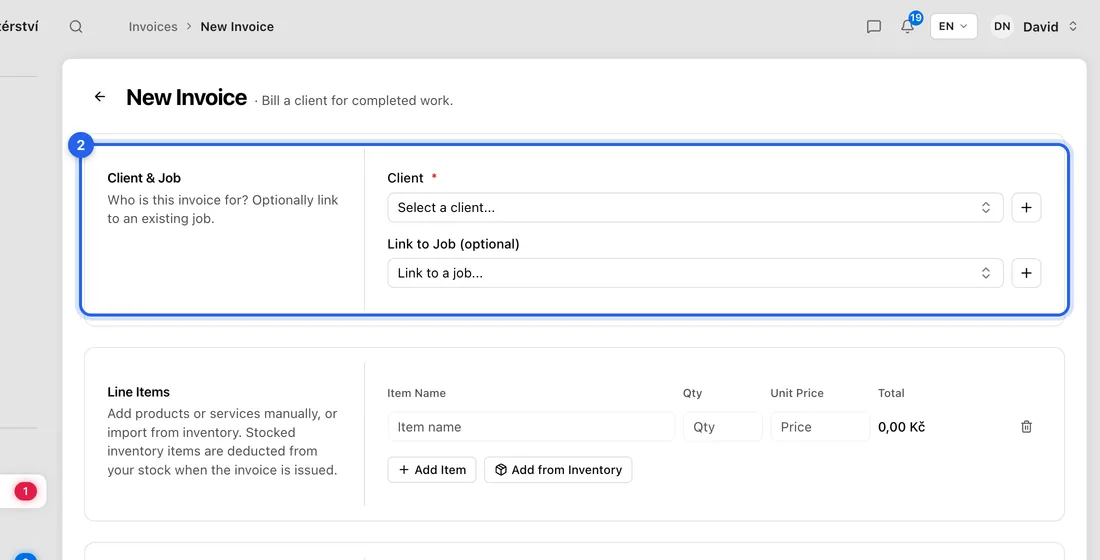
- 3Under Line Items, type the first line: Item Name (e.g. Boiler service), Qty and Unit Price. The Total works itself out.
- 4Click Add Item for each extra line. To pull in a product you stock, click Add from Inventory instead.
- 5Under Additional Details, leave Due Date empty to use your usual payment terms, or pick a date. Add Notes for the client if you like.
- 6Scroll down to Bank Details & QR Code and check it shows the account you want to be paid into.
- 7Check the totals under Summary.
Send it
- 1Click Send Invoice. You'll see “Invoice created and sent.” and you're taken back to your invoices.
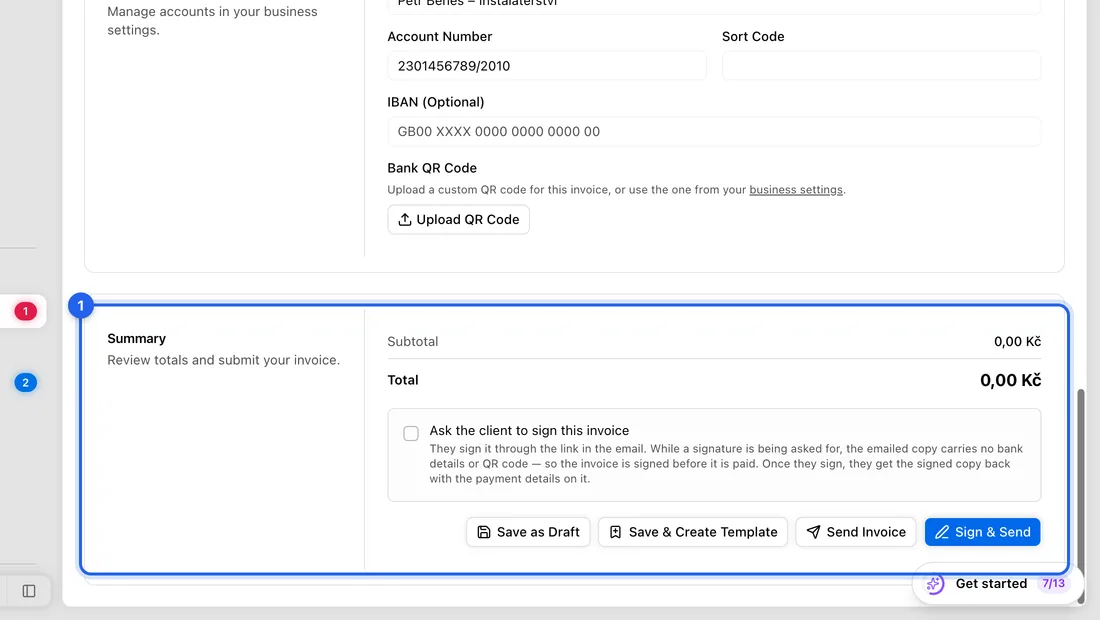
- 2Not ready yet? Click Save as Draft instead. Open it later from Invoices and click Send when you're ready.
- 3Want your signature on it? Click Sign & Send. The invoice is saved as a draft, you sign in the box that opens, and then it's sent.
What happens next
Your client gets an email with the invoice PDF attached and a link to view it online. If you've added a bank account, the PDF carries your account details and, if you switched it on, a QR code to pay.
If you left Due Date empty, it's set on sending: the send date plus the default due days from Settings → Business.
The invoice moves to Sent on your invoices board. When the client opens the link it moves to Viewed, and once it's paid, to Paid (see Mark an invoice paid).
If something doesn't work
The buttons at the bottom are greyed out: you haven't picked a client yet.
“Please add at least one line item or some work time.”: every invoice needs at least one line.
“Add your bank details so this invoice can be paid” at the top of the form: you have no bank account yet. Click Add bank details, add one, then come back.
Send Invoice is greyed out with “Sign the invoice above to send it”: your invoices are set to need your signature. Sign in the Your signature box above the buttons first.
“Failed to create invoice.”: nothing was saved. Check your connection and click Send Invoice again.