File an expense as a received invoice
Add the supplier's name and their invoice number to an expense, and it's also filed under Purchases, where you can track what you still owe.
When an expense has both a supplier and a document number (the number on the supplier's invoice), the app also files it as a received invoice. That's your record of what you've been billed: whether it's paid, when it's due, and, for VAT payers, the input VAT you can claim.
You don't fill anything in twice: the received invoice takes the amount, VAT, dates and paid status from the expense.
Before you start
The Purchases page, where received invoices are listed, is on Solo and up. Expenses themselves are on every plan.
On a new expense
- 1Go to Expenses and click Add Expense. Upload the supplier's invoice or click Skip for now →.
- 2Fill in Category, Description, Amount and Date as usual. Add the Due date from the invoice.
- 3Under Supplier & document number, type the Supplier, e.g. “Stavebniny Dvořák s.r.o.”, and the Document number exactly as it's printed, e.g. FV-2026-0412.
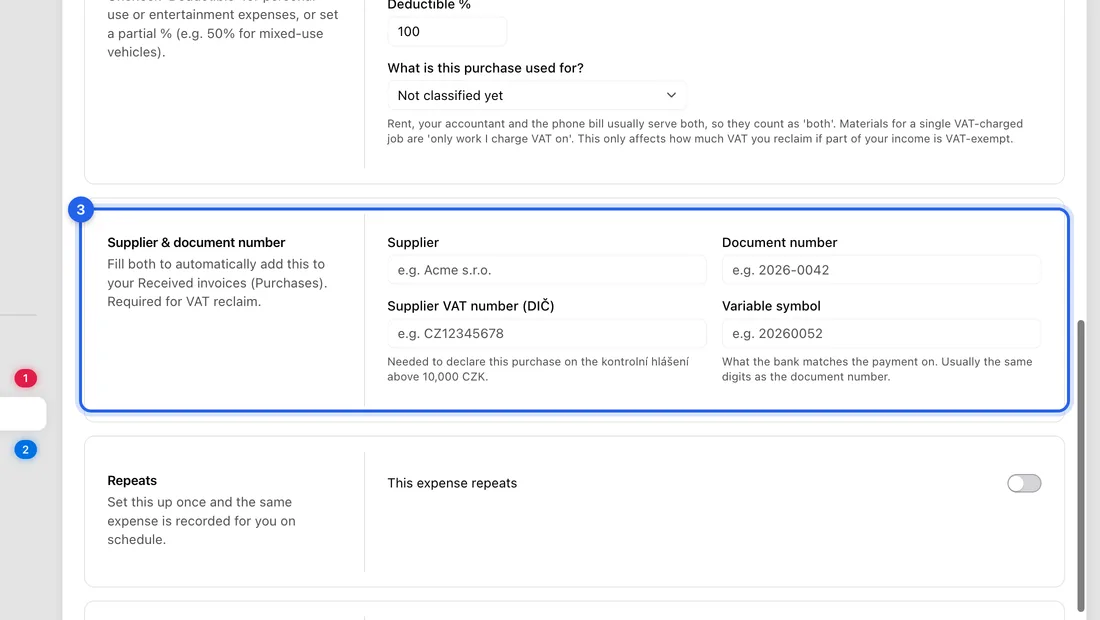
- 4Optionally fill in Supplier VAT number (DIČ). VAT payers need it to report a purchase over 10 000 Kč on the control statement.
- 5Under Variable symbol, click Same as document no., or type the symbol from the invoice. That's what an outgoing bank payment is matched on.
- 6If you've already paid, switch on Paid under Payment. Otherwise leave it off.
- 7Click Add Expense. You'll see “Expense added — also added to Received invoices”.
On an expense you already saved
- 1Go to Expenses and click the expense's row to open it.
- 2Fill in Supplier and Document number.
- 3Click Save Changes. The received invoice is created at that point.
Find it and mark it paid
- 1Click Accounting in the left sidebar. Under Transactions, click Purchases. The page is called Received invoices.
- 2Each row shows the Invoice #, Supplier, dates, Status (Unpaid, Overdue or Paid) and Total. Click a row to open it.
- 3When you've paid it, click Mark as paid. You'll see “Bill marked as paid”.
If your bank feed is connected, an outgoing payment with the same variable symbol and amount marks the received invoice paid on its own. See “Connect your bank and match payments to invoices”.
If something doesn't work
“Expense added — to include it in VAT, add both a supplier and a document number.”: you filled in only one of the two, so no received invoice was made. Open the expense, add the other one and click Save Changes.
“You have already recorded invoice … from this supplier.”: that invoice is already in the app, so nothing was saved. Click Open it or Open in Purchases to go to the one you have. If you deleted it, restore it from the trash instead of entering it again.
“Expense added, but a received invoice with that document number already exists — it wasn't linked.”: another supplier's invoice already uses that number. The expense is saved, but it isn't filed under Purchases. Check the number for a typo.