Stock across the van, warehouse and site — and scanning
Add your locations under Inventory → ⋯ → Locations, move stock between them with Transfer, and scan a barcode to find or add an item.
If you keep stock in more than one place, each item can have its own count per place, e.g. 12 in the warehouse and 3 on the van. Barcode scanning lets you find an item, or add it to a job, invoice or quote, by scanning its packaging. Both are on every plan.
Add your locations
- 1Open Inventory from the left sidebar.
- 2Click ⋯ at the top right and choose Locations. The Stock Locations page opens.
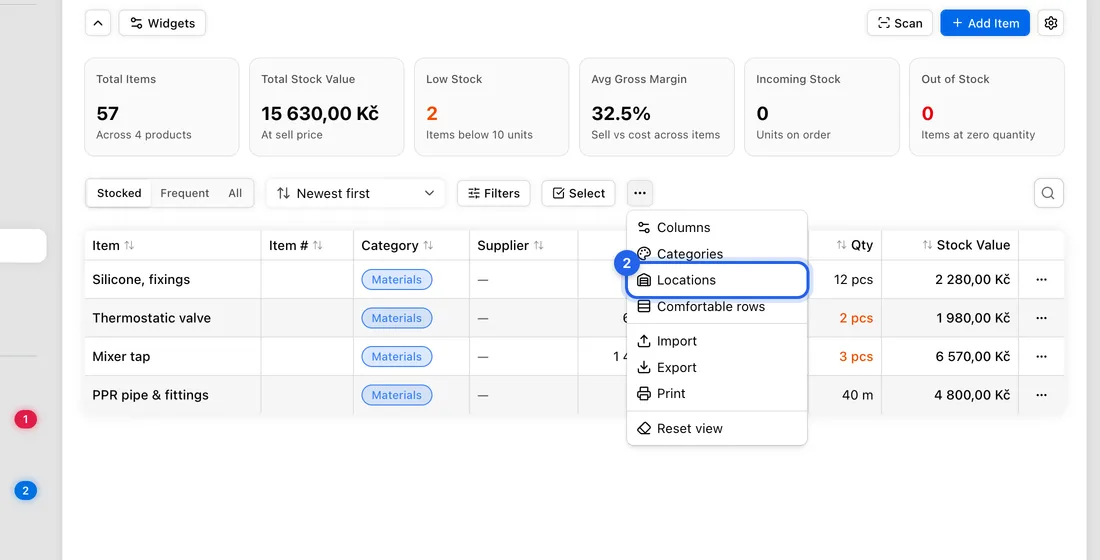
- 3Under New location, type a name, e.g. Van 02.
- 4Pick its Type: Van, Warehouse / store room, Site or Other.
- 5Click Add. You'll see “Location added”.
Your first location, called Main, is created for you. Click Set default on another one to make it the place used when there's only one to choose from. A location that holds no stock can be deleted; otherwise Archive it.
Move stock from one place to another
- 1In Inventory, click the item to open it.
- 2Under Stock you'll see each location's count. Click Transfer (it appears once you have two locations).
- 3Choose where it's coming From and where it's going To, and type the Quantity, e.g. 5.
- 4Click Transfer. You'll see “Stock transferred”. The total stays the same; only where it sits changes.
To correct a count, e.g. after a stocktake or a breakage, click Adjust instead: pick the Location, type the Change (+ / −) such as 5 or -2, choose a Reason (Correction, Write-off, Return or Opening balance) and click Apply.
Scan to find an item
- 1On the Inventory page, click Scan.
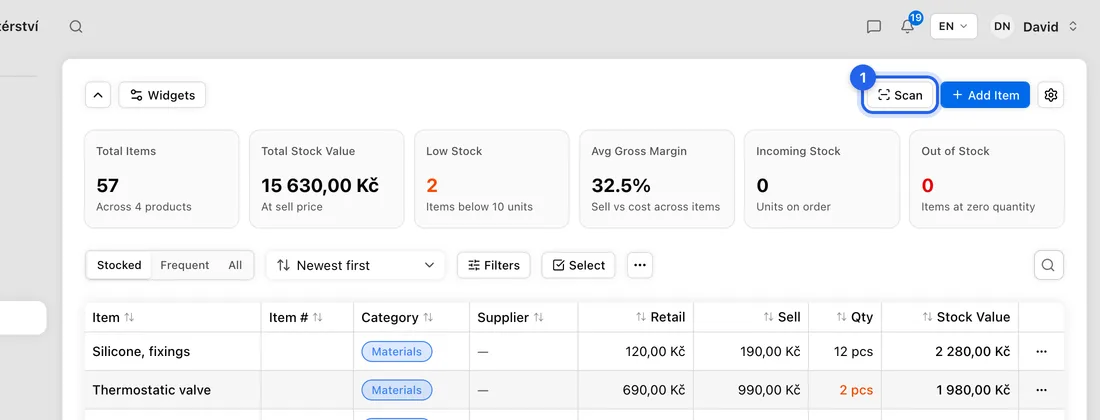
- 2Point your phone's or laptop's camera at the barcode. With a handheld scanner, just scan: the code goes into the box under the camera. You can also type the code and click Find.
- 3If it matches, the item opens. If nothing matches, you'll see “No item matches …” with a Create button that starts a new item with that barcode already filled in.
The code is matched against each item's Barcode, then its Item Number (Personal SKU) and Supplier SKU. To give an item a barcode, open it and click Scan next to Barcode.
Scan items onto a job, invoice or quote
Click Add from Inventory on the job, invoice or quote, then click Scan. Keep scanning: each item is added as you go (“Added …”). Close the scanner when you're done. If you have more than one location, pick where the items come from under Take from….
If something doesn't work
The camera doesn't start: the box under the camera says why (no camera found, permission blocked in the browser, or the page isn't on a secure connection). You can still use a handheld scanner or type the code.
“Not enough stock at the source location.”: you tried to transfer more than that location holds. Check its count and try a smaller number.
“Choose two different locations and a positive amount.”: From and To are the same, or the Quantity is empty.
There's no Transfer button: you only have one location. Add another first.